Pre-Installation Preparation
Gather all materials, including the manual, tools, and thermostat components. Ensure the wall area is clear and measure accurately for proper installation alignment. Manage excess wires by securing them neatly, and insulate the wall opening to prevent heat loss or gain, ensuring a safe and efficient installation environment.
1.1 Locating the Installation Manual
Access the Honeywell FocusPRO 6000 thermostat manual online through Honeywell’s official website or trusted manual databases. The manual provides detailed installation instructions, compatibility checks, and wiring diagrams. Ensure you download the correct version for your model, as slight variations may exist. Reading the manual thoroughly before starting ensures a smooth installation process and helps avoid common errors.
1.2 Understanding Wall Preparation
Proper wall preparation ensures a secure and efficient thermostat installation. Remove any debris from the wall opening and check for levelness. Insulate the area to prevent heat transfer, which could affect thermostat accuracy. Use non-flammable insulation material and ensure all wires are neatly managed, pushing excess wires back into the wall to avoid interference during mounting.
1.2.1 Managing Excess Wires
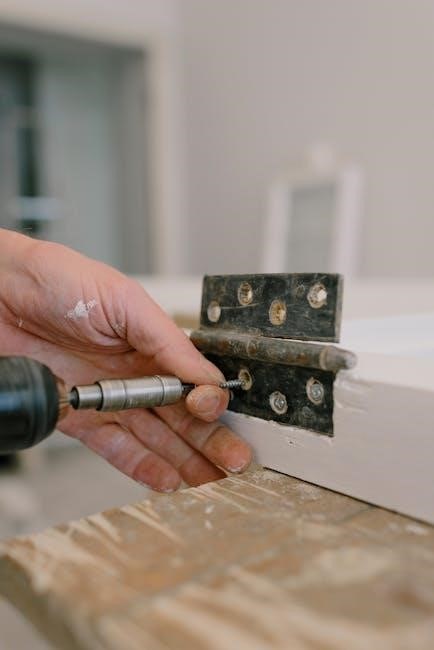
Before installing the Honeywell Pro 6000 thermostat, ensure all excess wires are neatly managed. Gently push any extra wires back into the wall to prevent them from obstructing the thermostat’s mounting. Secure loose wires with electrical tape or wire ties to keep them organized and out of the way, ensuring a clean and safe installation process.
1.2.2 Insulating the Wall Opening
Properly insulate the wall opening to ensure efficient thermostat performance and prevent heat transfer. Use non-flammable insulation material to fill gaps around the thermostat mounting area. This step is crucial for maintaining accurate temperature readings and optimizing energy efficiency. Ensure the insulation is snug but not compressing the wires, and align with local building codes for safety and effectiveness.
Thermostat Mounting
Remove the wallplate from the thermostat and align the tabs with the wallplate slots. Gently push until it snaps securely into place, ensuring a firm connection.
2.1 Aligning Wallplate and Thermostat
Align the four tabs on the wallplate with the corresponding slots on the thermostat’s back. Ensure proper alignment for a secure fit. Remove the battery holder before mounting. Gently press the thermostat onto the wallplate until it snaps firmly into place, confirming a snug and even connection. Refer to the wiring diagram for compatibility and system settings.
2.1.1 Identifying Tabs and Slots
Locate the four alignment tabs on the back of the wallplate and align them with the corresponding slots on the thermostat. Ensure the tabs fit securely into the slots to guarantee proper installation. The tabs are designed to guide the thermostat into place, ensuring a flush and even mounting. Refer to the wiring diagram for further clarity on alignment.
2.1.2 Securely Snapping into Place
Gently press the thermostat onto the wallplate, ensuring it aligns perfectly with the tabs and slots. Apply steady pressure until it clicks securely into place. Verify that the thermostat sits flush against the wall and all connections are firm to ensure proper functionality and avoid loose wiring issues.
Wiring Considerations
Ensure compatibility with existing wiring and system requirements. Secure loose wires to prevent connectivity issues. Refer to the wiring diagram for accurate connections and configurations.
3.1 Checking Compatibility
Verify the Honeywell Pro 6000 thermostat is compatible with your HVAC system. Ensure wiring matches the required configuration, checking terminals like R, W, Y, and C. For heat pumps, confirm compatibility with auxiliary heat settings. If replacing an older model, like the VisionPro, cross-reference wiring to avoid mismatches. Use the provided wiring diagram to confirm compatibility before proceeding with installation to prevent system malfunctions.
3.1.1 Replacing Existing Thermostat (e.g., VisionPro)
When replacing an older thermostat like the VisionPro, ensure power is turned off at the circuit breaker. Carefully label existing wires before disconnecting them to maintain continuity. Compare the wire labels with the Honeywell Pro 6000 terminals to confirm compatibility. If wiring configurations differ, consult the manual or wiring diagram for accurate connections. Secure any loose wires to prevent installation issues.
3.1.2 Ensuring Loose Wires are Secured
Identify any loose wires during installation to prevent connectivity issues. Gently push excess wires into the wall to keep the area clear. Use non-flammable insulation to secure wires at the wall opening, ensuring they remain in place. Double-check all wire connections to the thermostat terminals to confirm they are tight and properly seated, avoiding potential malfunctions.
3.2 Consulting Wiring Diagrams
Consult the wiring diagrams provided in the manual to understand the specific connections for your system. Match the wires to the appropriate terminals on the thermostat, ensuring compatibility with your heating/cooling setup. For heat pumps, verify the correct configuration of Rc power and compressor contactor connections. Refer to the diagram for proper installation, avoiding mismatches that could lead to system malfunctions or safety hazards.
Programming the Thermostat
Navigate through the programming menu to set custom temperature schedules. Select heating or cooling modes, and choose between Auto or Emergency Heat options if applicable. Adjust settings to align with your home’s system configuration, ensuring optimal performance and energy efficiency.
4.1 Initial Setup
Start by disconnecting power to the system for safety. Remove the battery holder and insert the reference card after mounting the wallplate. Follow the on-screen instructions to set basic configurations, such as time, date, and temperature units. Use the SYSTEM button to select heating or cooling modes and enable features like Auto or Emergency Heat if applicable. Save settings to proceed to advanced programming.
4.1.1 Navigating the Programming Menu
Access the programming menu by pressing the HOLD button to override the current temperature. Use the up and down arrows to adjust settings. Set temperature schedules by selecting the desired time and temperature. Press NEXT to cycle through days or periods. Save changes by pressing the HOLD button again. Refer to the reference card for detailed navigation tips and programming shortcuts.
4.1;2 Setting Temperature Schedules
Set your desired temperature for each period by using the up and down arrows. Choose the start and end times for heating and cooling. Press NEXT to cycle through different days or periods. Use the HOLD button to save your schedule. Refer to the reference card for guidance on customizing your temperature settings and ensuring energy efficiency throughout the day.

System Configuration
Configure your system by selecting heating or cooling modes. Understand Auto and Emergency Heat options for heat pumps. Adjust settings to optimize your home’s comfort and efficiency.
5.1 Selecting Heating/Cooling Modes
Select the appropriate heating or cooling mode based on your system type. For heat pumps, choose between standard heating and emergency heat. Use the SYSTEM button to toggle between Heat, Cool, or Auto modes. Ensure settings match your home’s HVAC configuration for optimal performance and energy efficiency. Refer to the manual for specific button functions and mode transitions.
5.1.1 Understanding Auto and Emergency Heat Options
The Auto mode allows the thermostat to automatically switch between heating and cooling based on the indoor temperature; Emergency Heat is for heat pumps, activating auxiliary heat when the compressor is locked out. These options may not appear depending on your system configuration. Always refer to the manual to ensure proper setup for your specific HVAC system type.
5.1.2 Adjusting Settings for Home Systems
After selecting the heating or cooling mode, use the SYSTEM button to configure settings based on your home’s HVAC setup. Adjust options like temperature range and cycle rate to optimize performance. Refer to the manual for specific instructions, as some features may vary depending on your system’s configuration and compatibility with the Honeywell Pro 6000 thermostat.
Troubleshooting and Error Codes
Identify common issues like loose wires or misconfigurations. Refer to the error code list in the manual for specific solutions and ensure proper system operation.
6.1 Common Issues and Solutions
Address issues like loose wires by verifying connections and tightening them. For display malfunctions, restart the thermostat or replace batteries. Check system configuration errors by ensuring settings match your HVAC setup. Refer to the manual for error codes and follow troubleshooting steps to resolve problems efficiently and restore functionality.
6.1.1 Addressing Loose Wires
Power off the system before handling wires to ensure safety. Inspect all connections to the thermostat, tightening any loose wires to maintain proper contact. If wires are damaged, replace them to prevent malfunctions. Consult the wiring diagram for correct connections. After securing, test the system to ensure everything functions correctly and efficiently.
6.1.2 Correcting System Configuration Errors
Access the system settings menu to verify the configuration matches your home’s heating/cooling system. Ensure the correct mode (heat, cool, or auto) is selected. For heat pumps, check if emergency heat is enabled. Refer to the wiring diagram to confirm proper connections. Save changes and test the system to ensure accurate operation and efficiency.
User Guide for Daily Operations
Use the Hold button to override programmed settings and adjust temperature with the temperature buttons; Refer to the reference card for quick guidance on daily operations.
7.1 Using Basic Functions
Access basic functions by navigating the thermostat’s interface. Use the temperature buttons to adjust settings and the Hold button to override schedules. The display screen shows current temperature and mode. Press the System button to switch between heating and cooling. Use the Menu button to access advanced settings and ensure proper operation of your heating and cooling systems efficiently.
7.1.1 Operating the Hold Button
Press the Hold button to override the programmed temperature schedule. This feature allows temporary adjustments without changing the overall settings. The screen will indicate when Hold is active. Press Run Schedule to return to the programmed settings, ensuring flexible temperature control while maintaining energy efficiency and comfort in your home environment;
7.1.2 Adjusting Temperature Settings
Use the up and down arrows to manually adjust the current temperature. Access the programming menu to set schedules for different times and days. Save settings to apply changes. Use the Hold button for temporary overrides. Adjust system mode between heating and cooling as needed. Explore features like auto-changeover for energy optimization. Ensure batteries are installed correctly for continuous operation.
7.2 Reference Card and Quick Guide
A Reference Card is included for quick access to essential operations. It outlines basic functions like temperature adjustment, mode selection, and schedule programming. The Quick Guide provides step-by-step instructions for common tasks, ensuring easy navigation. Insert the reference card after wallplate installation for convenient access. Use it to troubleshoot or review operations without consulting the full manual.

Maintenance and Upkeep
Regularly replace batteries to ensure consistent performance. Clean the thermostat screen with a soft cloth to maintain visibility. Check and secure loose wires for optimal functionality.
8.1 Replacing Batteries
Ensure the thermostat is powered off by switching it at the circuit breaker. Open the battery compartment, typically located on the front or back, using a screwdriver if necessary. Remove the old batteries and dispose of them properly. Insert new AA or AAA batteries, aligning them correctly with the terminals. Close the compartment, restore power, and verify the thermostat’s display lights up and functions correctly.
8.2 Cleaning the Thermostat Screen
Power off the thermostat at the circuit breaker to avoid any accidental activation. Dampen a soft, lint-free cloth with distilled water, ensuring it’s not soaking wet. Gently wipe the screen, avoiding pressure that might damage the display. For stubborn spots, use a mild glass cleaner, but ensure no liquids seep into the thermostat. Dry thoroughly with a clean cloth to prevent streaks, restoring clarity and functionality.
Step-by-Step Installation Checklist
Ensure all pre-installation steps are completed. Verify wallplate alignment, secure wiring connections, and confirm thermostat mounting. Follow programming instructions for system configuration. Test all functions to ensure proper operation.
9.1 Pre-Installation Checklist
Ensure power is disconnected and batteries are removed. Verify wallplate alignment with thermostat and manage excess wires securely. Insulate the wall opening properly and check compatibility with existing systems. Review wiring diagrams and confirm all connections match the system requirements. Ensure the thermostat is compatible with your HVAC system, especially when replacing older models like VisionPro. Refer to the manual for specific preparation steps.
9.2 Mounting and Wiring Checklist
Disconnect power and remove the battery holder. 2. Separate the wallplate from the thermostat. 3. Push excess wires into the wall opening and insulate it. 4. Align the wallplate tabs with the thermostat slots. 5. Snap the thermostat into place securely. 6. Ensure all wires are connected properly and match the system requirements. 7. Reconnect power and test the system functionality.
9.3 Programming and Testing Checklist
Power on the thermostat and follow initial setup prompts. 2. Set temperature schedules and preferences. 3. Test heating and cooling modes to ensure functionality. 4. Check system compatibility and adjust settings as needed. 5. Verify all programmed features operate correctly. 6. Review the reference guide for additional configuration options. 7. Ensure the thermostat responds accurately to temperature changes and holds settings.
Additional Resources
Visit Honeywell’s official website for video tutorials and detailed guides. Consult the user manual or contact customer support for expert assistance with complex installation or programming steps.
10.1 Video Tutorials for Complex Steps
Access step-by-step video guides on Honeywell’s official website and YouTube for detailed instructions. These tutorials cover wiring, mounting, and system configuration, providing visual clarity for complex tasks. Ideal for DIY enthusiasts, they offer expert guidance, ensuring a smooth installation process and proper thermostat setup. Utilize these resources to troubleshoot and resolve issues effectively, enhancing your installation confidence and skills.
10.2 Seeking Expert Assistance
Contact Honeywell’s customer support for professional help with installation challenges. Certified technicians can address wiring issues or system configuration problems. Visit Honeywell’s website for live chat, email support, or phone assistance. Additionally, local HVAC professionals can provide hands-on guidance, ensuring a seamless and correct installation tailored to your home’s specific heating and cooling system requirements for optimal performance and efficiency;